Thursday, August 19, 2010

Finish the Course


You should just about have it. A three to four generation family tree. Congratulations. Be sure and remember that for each square and circle you need to place near it the information regarding birth, death, place of birth, place of death, where buried, and all the other things you remember, or would want someone else to know about this person in your family tree. By now the first page in your notebook should look pretty messy. You have 79 sheets left, so you can redraw the geneogram more to your liking.

Now before you go on in your tree climbing, be sure and record what you know about your family now. You may be the only one to do so. Keep up the good work.

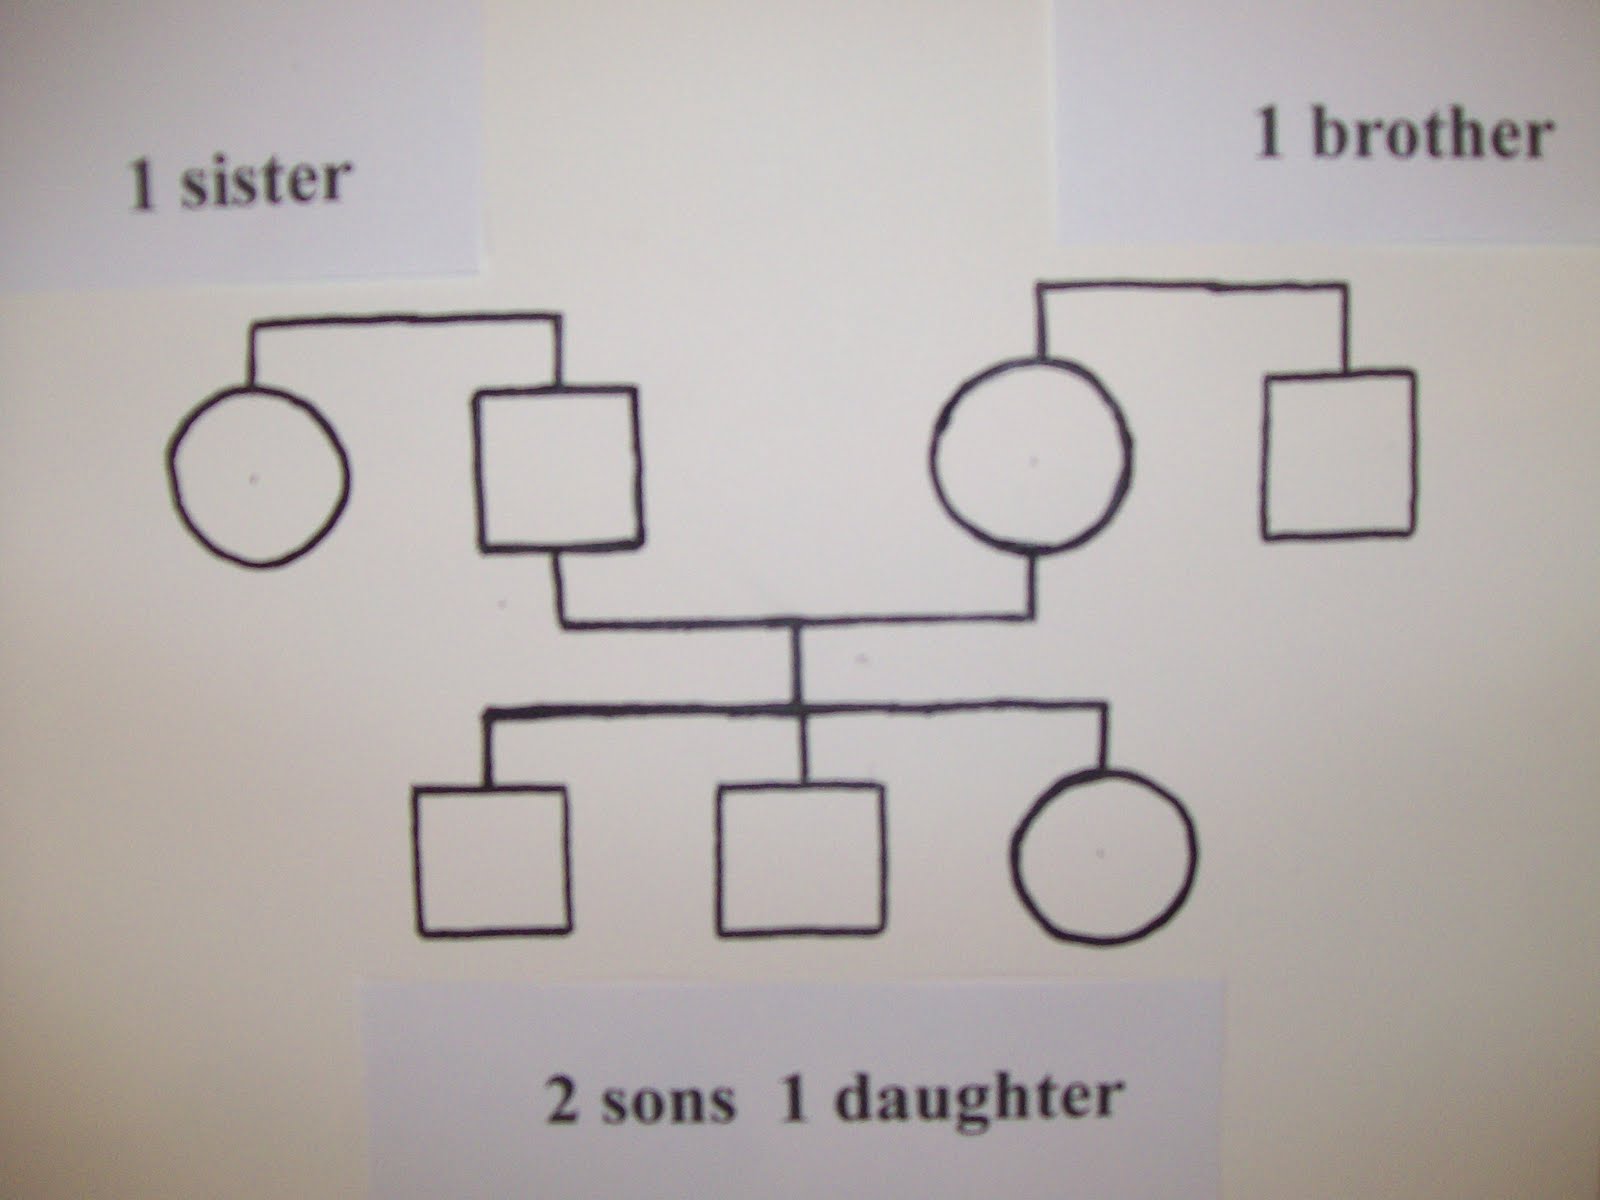
The above picture is a geneogram I have been working on. It is rough, but ready to show you a three generation family tree. When you have completed your three generational family tree, you are ready to begin, ge-ne-al-o-gy 201.

Saturday, August 14, 2010

Taking Shape


By now you should have a good start on your family tree. The "squares" and "circles" should be in place for you, your spouse, and your children. The next step is to add your parents, your sisters, and your brothers.

From your own square or circle, extend from the top a vertical line a few spaces. Now draw a horizontal line toward the outside of the graph paper forming a new generation line which you can place your bothers and sisters. Space each new square and circle for both you and your spouses' brothers and sisters. These should be drawn such that each symbol is at the same level as your own, equally spaced usually 3-4 little spaces on the graph paper. This of course would mean that you are of the same generation. Remember to place names, date of birth, date of death, place of birth, where buried, and other notes as indicated. You will soon find that the page seems to get crowed fairly quickly.

Now the final step is to draw a vertical line halfway out the brothers and sisters line extending from the top. This begins your fathers, and mothers, generation. You should have experience drawing your squares and circles. Place a new generation line (horizontal)from the new vertical line coming out of the top of your brothers' and sisters' line. You will begin to see the larger family tree as it takes shape before your very eyes!

Friday, August 13, 2010

Building the Tree


The next step is to begin to add the immediate family members that you know. If married, and have children, place a symbol for each child. This is done by connecting the marriage line (horizontal line between you and your spouse) by a vertical line to a new horizontal line below your square and circle. Draw a square (if male) from this line using a short vertical line to connect each child by symbol. (circle if female) Then place the names, date of birth, location of birth, any special notes, like left handed, and you will have your immediate family. In Family Medicine, we called this the "nuclear family"!

Now it is important to begin the habit of writing the facts in an abridged form. Abbreviations are very helpful. I use b. for date of birth, d. for date of death, and m. for date of marriage. To record dates, I have learned over the past 50 years, that writing these as day - month - year is the most helpful and least confusing. I will write a birth date as 8 May 1950 rather than 5-8-50 since many records will record dates in various ways. [English records often use day-month-year, and American records use month-day-year!] As your family tree grows, the dates may get confused, so it is important to establish a method at the very beginning and keep with it.

So let's review: Squares = males, Circles = females , vertical lines move from one generation to the next, horizontal lines move between the same generation. Dates are written day-month-year. Abbreviations are : b. = date of birth, d. = date of death, and m. = date of marriage.

Wednesday, August 11, 2010

Squares and Circles


Thirty years of practicing Family Medicine has taught me a number of things about families. Patient charts were central to this care, and one aspect was the family information we called a "geneogram". This information was collected over a number of office visits, and would take up about 1/2 page. It was made up of "squares" and "circles" connected by vertical and horizontal lines that drew a picture of the family unit. Very early I applied this technique to my own family tree climbing. It is this method that has served me well, and after 50 years of doing genealogy I would recommend it to those who are just starting their own family tree.

It begins by using the first page of the graph paper you have just purchased. You will need a ruler and pencil, and in the middle of the page draw a "square" if male, and a "circle" if female. [four little blocks will work] This symbol becomes you! Now take a vertical line a few blocks below the symbol and draw additional symbols that make up your family. If married, you draw a "square"/"circle" at the exact level of your symbol. You then connect this symbol by using a horizontal line that ties to the vertical lines that you have already drawn. Presto...a family unit: male, female, and you begin your family tree. It is here that you begin with what you know! List the dates of birth, marriage, etc., next to each symbol that you have drawn. The marriage date is placed on the horizontal line that connects the "square" [male], to the "circle" [female].

It is best to use a pencil since changing information is very frequent as the family geneogram grows. You will soon see that the picture you draw shows your family as you begin to add information. For me, this is so much better than filling in charts with names and dates, since this geneogram allows one to see their family tree! The squares and circles do not have to be perfect, but as you get use to drawing them you will get better.

Sunday, August 8, 2010

Where to start!

It is often after the loss of a parent or the funeral of a relative that you find a stack of family papers or box of old pictures. The papers are packed together and the pictures are old, and well, you think if only I had...? Who are these people anyway? What do I do with them? Just throw them out? Well, it is never too late to begin putting together a story of the family!

Where do I start? How do I start? What information do I need? How do I get it? What stories lie beneath these stacks of paper and stacks of old pictures?

After more than 50 years of doing my own families' story, here is where I would recommend you to start. Walmart! Yes, that's Walmart. Go to the notebook section of the store and purchase a special type of paper called graph filler paper. It comes in 80 sheets of 10.5 X 8 inch, and is 3-Hole punched. Then purchase a 1/2 inch or 1 inch notebook, a "Basic Economy" will do, color of your choice. This becomes the foundation of your family story.

Now since you are reading this on a blogspot, you must have computer and Microsoft works or word. Type a title page "My Family Story" by...insert your name. This will give you ownership and tell everyone in the family that you are beginning the families' story. Place the graph paper in the 3-ring notebook and you have begun! On the very first page write your name, date of birth, place of birth, and other facts you think are important...next comes the squares and circles.

GE-NE-AL-O-GY 101

This blog site is intended for those who have started thinking about or have just started doing genealogy. The word genealogy comes from the Greek genea which means "race", "family". It is added to the Greek logia which means "akin". Thus the akin family! It is an account of the descent of a person, family, or group from an ancestor.

Hopefully this blog will provide an avenue to assist those who have an interest in beginning their families' account. It will help you do your own families' story and genealogy. All you have to do is ask the questions regarding how to start. I have been doing this genealogy stuff for more than 50 years and would like to help those who have an interest in beginning this tree climbing adventure. So if you have a question, post it under comments. We can then begin a conversation.